Thursday, December 28, 2017

Hing Aloo Matar er Torkari/Aloo Matar/Potato with Yellow Peas( No Onion or Garlic )

Hing Aloo  Matar / Aloo Matar Sabzi or Curry /Potato with Asafoetida and Yellow Peas(No Onion or garlic )


This Potato/Aloo Curry is Chatpata and Spicy and goes well with Roti/Puffed Rice/ Moori/Poori/Luchi /Paratha.

Preparation time - Soaking Dry Yellow Peas/Matar overnight (at least 6 hrs ) and pressure cook with water till partly boiled since with Aloo we will further cook.(Pressure whistle depends on your pressure cooker ).Add salt as per your taste and be cautious because again we will add salt in the curry.Other preparation work 6-7 min.

Cooking Time - 15 minutes.

Ingredients:-

1. 3 Medium sized Potatoes/Aloo
2. About 1 cup of  partially boiled Matar .(If you fully boil it then add it towards the end of the dish into the curry ).
3. Ginger crushed in a mortar and pestle ( About 2 inch Ginger ).
4. Pinch of Hing (approx 1/8 teaspoon)
5. 1 Whole Red Chilly ( Increase if you want more heat ).
6. 1 tablespoon whole Cumin
7. About one to half teaspoon Kasoori Methi/dried Fenugreek leaves ( I added half teaspoon )
8. Make a thick Masala/Spice paste with very little water ( 1/4 teaspoon Cayenne or redchilly powder +1/4 Teaspoon Paprika or Kashmiri red chilly powder+ little less than 1/4 teaspoon turmeric + 1 and half teaspoon Coriander powder + 1/2 teaspoon Cumin Powder ).
9. Salt as per your taste ( I added 1 teaspoon ) ( I would advice add little salt see your preference and then adjust )
10. Water for  Soaking and Pressure cooking the Matar  and also adding in the curry as per your thickness preference .This will be little on the watery side.
11. Oil ( preferably Mustard oil ) but  vegetable oil is also fine ( about 1 tablespoon )

NOTE

1.Too much of Hing can turn your curry bitter .
2. Increase or decrease the amount of Chilly powders as per your heat preference.

Preparation:-

1. Chop the Potatoes into medium Cubes ( i have immersed them in water so as not to discolour them).
2. Soak and boil the Matar ( I partially boiled it )
3. Dry roast the Cumin on a medium to low flame for 30 to 40 seconds  cool and grind it into a powder.( You can also dry roast one red chilly separately and grind with the cumin to enhance the heat of the dish ).
4. Make the Masala paste as per the instruction in Point number 8 under Ingredients.
5. Crush the Ginger in a Mortar and Pestle (Hamaldista )

Cooking :-

1. Take an utensil ( I used non stick ) and add oil let it warm up.
2. Add the Whole Red chilly ( If you wish you can also add 1/4 teaspoon of whole cumin at this point ) but I did not add.
4. When the red chilly has infused its flavours into the oil add the Hing and quickly add the crushed Ginger;fry for about 30 seconds and add  Potatoes and mix.( I love hing so I also add just a dash of hing just when the curry is about to be done but its not necessary )
5. After about a minute add the the prepared masala paste and mix.
6. Cover and cook and stir in between.
7. Add about 1 and half cup of water,salt  and the partially boiled Matar let it come to a simmer and then close the lid.
8. Keep an eye intermittently opening the lid and checking if the potatoes are cooked are not.
9. Adjust your curry consistency. when nearly cooked I smash up only some Aloo and Matar into the curry as I love it that way.
10. Add the roasted Cumin powder  .
11. Add the Kasoori Methi slightly crushing with your palm and mix.
12. Cover and let it stand for 5 min before serving so as to infuse the flavours.
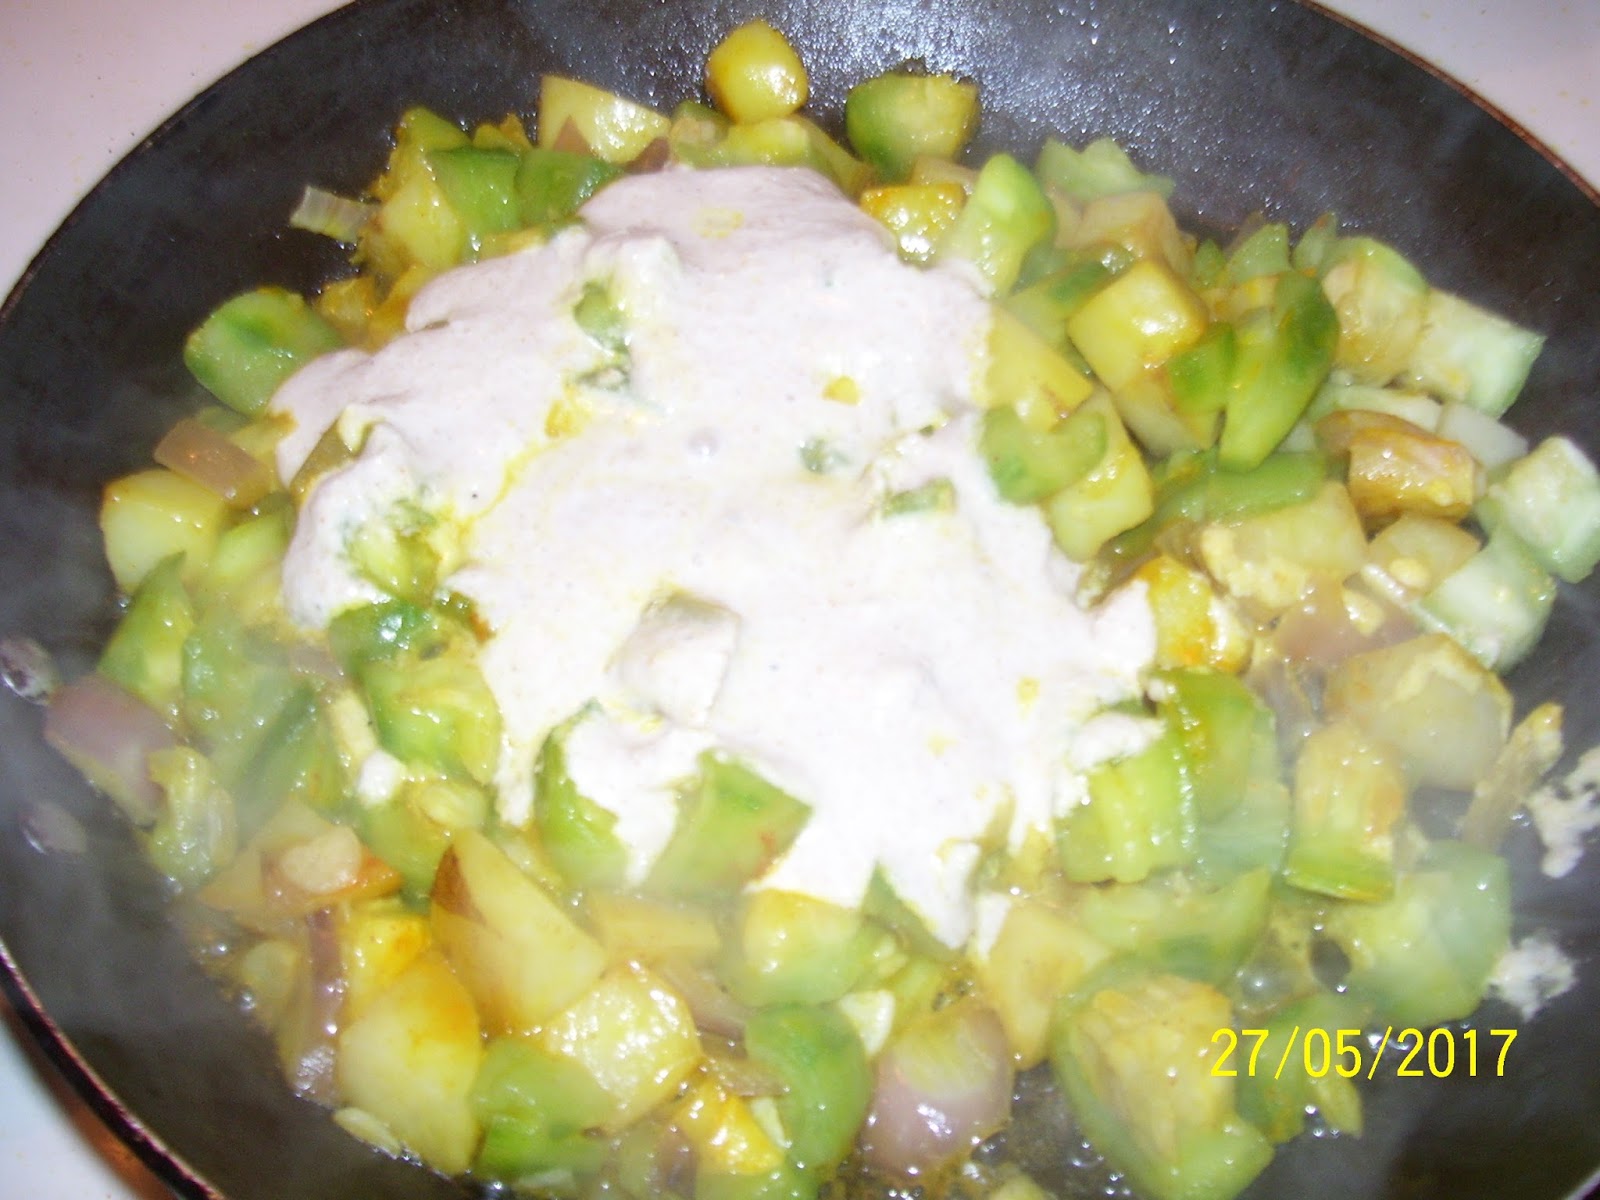
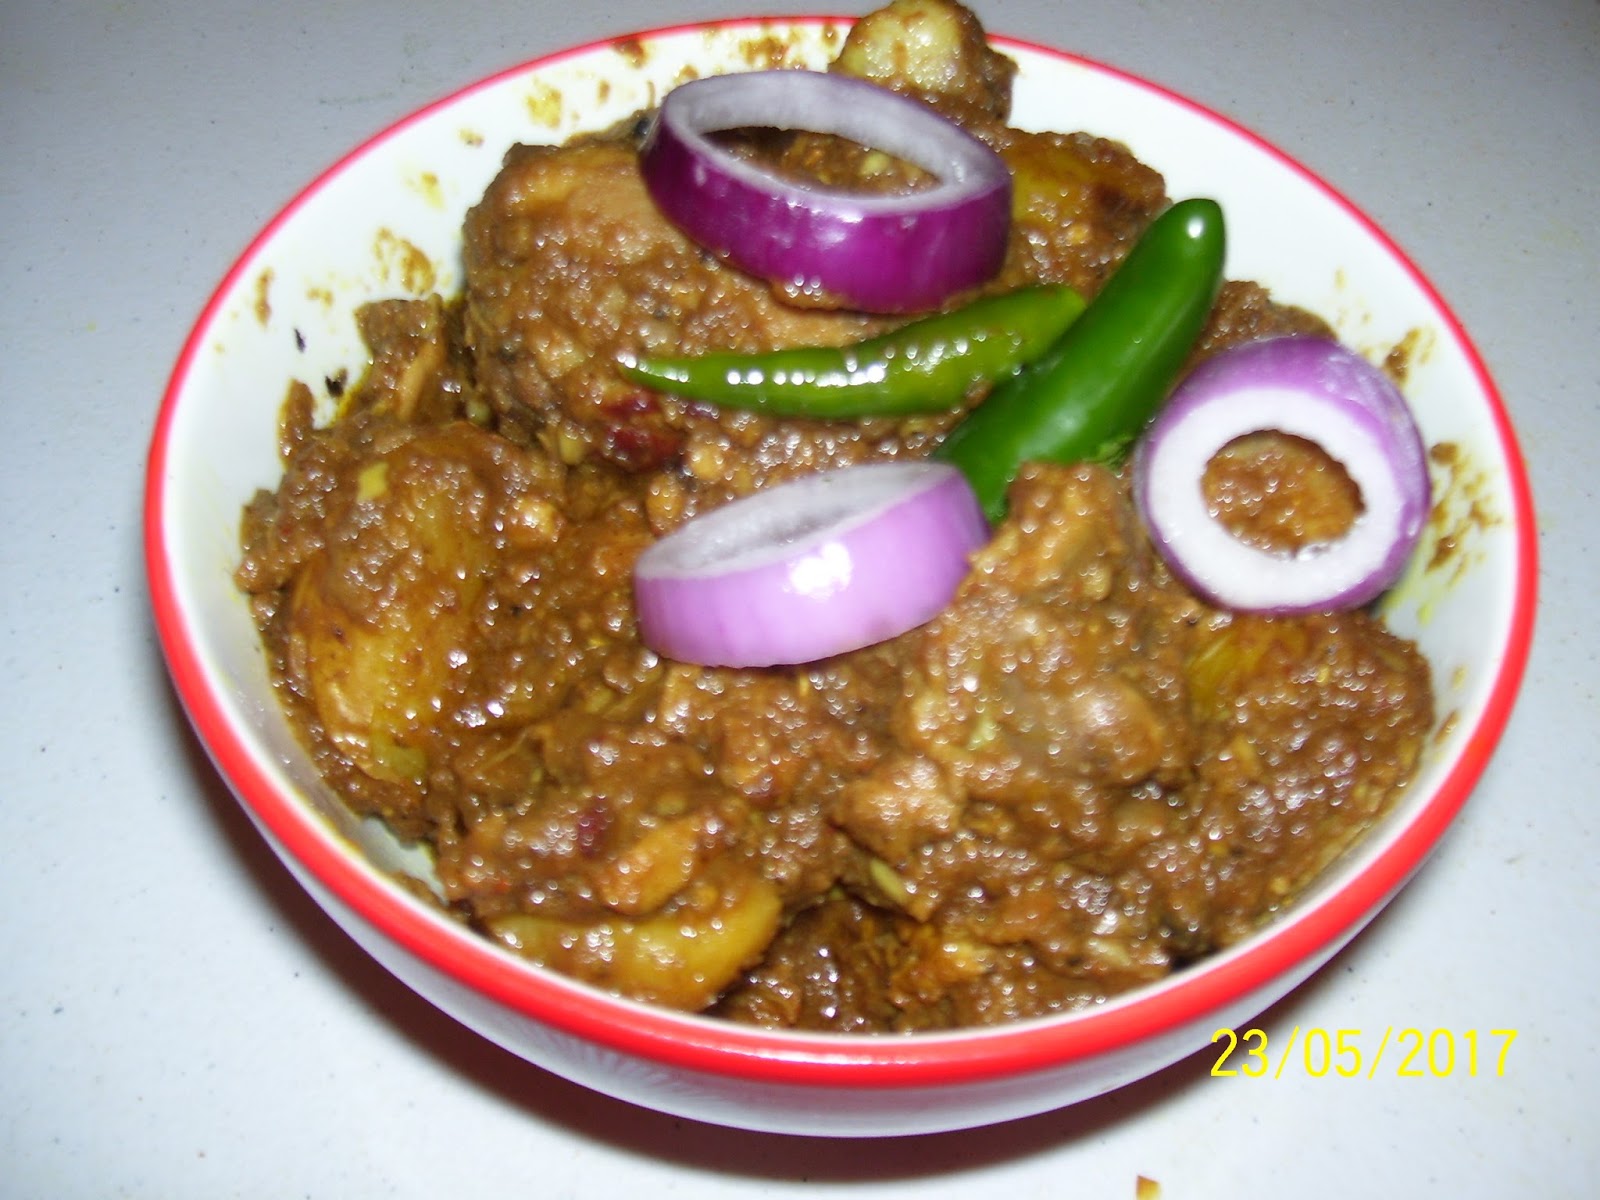
Pictures :-


Wednesday, December 27, 2017

Aloo Jhingey Posto/Aloo Ridge gourd with poppy seeds/khus khus

Aloo Jhingey (Sinqua or Ridge gourd ) posto/poppy seeds or khus khus


Preparation time - 5 to 7 minutes
Cooking time - 20 minutes.

Ingredients

1. One big Potato/aloo
2. 1 jhingey / Ridge gourd
3. Little more than 1/4th of a big Onion
4. About 4-5  tablespoon of Posto / Poppy seeds
5. Pinch of turmeric ( Optional )
6. Cayenne or red chilly powder ( about 1/4 teaspoon or to taste )
7. Green chillies ( as per your heat tolerance )
8. Preferably Mustard Oil ( little bit more is used I used about 2 tablespoon )
9. Water as required not too much ( i will make the dry version )
10. Salt as per taste ( I used about 1 teaspoon )

Note Ridge gourd or jhingey reduces in volume when cooked.

Preparation

1. Chop the Potato and Jhingey into  medium cubes.
2. Chop the onions
3. Slit the green chillies
4. Grind the Posto either using traditional sheel nora and little water at a time to make a thick paste or mixer grinder ( I use my coffee grinder to grind without water first and then i add very little water at a time to make the desired consistency )

Cooking

1. Take an utensil ( I use non-stick ) and add oil.
2. As the oil warms up add the Potatoes.
3. When the potatoes are little done I will add the onion as i want the onion to just wilt not turn brown only translucent.
4. After sometime also add the Jhingey
5. Stir and cook add the turmeric if you are using turmeric.
6. Add the Red chilly powder.
7. Jhingey will give out water so cover and cook so that the veggies can cook in their own juices.
8. When little done add the posto paste. As the posto paste has water mixed with it additional water is not required but if needed just sprinkle water do not add lot of water.The technique is sprinkle water mix cover and cook then again open and see if veggies are sticking o the bottom then again sprinkle water mix and cover cook.The water collected inside the lid should be poured back into it  which will help the veggies to get cooked.Be vigilant as the posto may stick to the bottom.Add the salt to taste.
9. Do this till veggies are cooked and posto also emits a nice smell.
10. Add the slit green chilly mix cover it and switch off the flame.Let it stand for 5 mins before serving with Hot steaming Rice.

Pictures:-


Whole Chicken Roast with gravy/sauce on th side- Blend of different cuisine

 Whole Chicken Roast  by blending American Indian Italian and Chinese cuisine Ingredients.


 Whole Chicken Roast which i have cooked blending cuisine from American Italian Indian and Chinese styles. ( spices and techniques  mingled ) .

Preparation time - Overnight Chicken marination (6 hrs minimum ) then second marination (1hr )
Cooking time - 1 hr 30 minutes.( May vary a little with your oven or personal preference ).

Ingredients for the first marination:-

1. About 3 pond of whole chicken. ( I used with the skin on )
2. Salt (I used 3 tablespoon ) or as per your taste. It seems to be quite a lot but its a big chicken and i like my chicken to be nicely salted.
3. Curd 2  heaping tablespoon preferably hung curd.
4. Paprika/ Kashmiri red chilly powder- 1 teaspoon ( use as per your heat preference )
5. Cayenne/Red pepper powder - 1 teaspoon ( use as per your heat preference )
6.  Juice of a half a Lemon
7. Sprinkle of black pepper powder all over the Chicken.


Ingredients For Second marination

1. Italian herb mix - Parsley,Oregano and Ready made Italian herb mix.
2. Coriander Powder - 2 table spoon full ( Don't get scared and run away ) I assure you the end product with the dipping gravy sauce will be mouthwatering.
3. Clarified butter  also called Ghee 2 tablespoon  ( please use Ghee not the regular butter ) if you are new to ghee then opt for butter because you may not like its smell. I have used my homemade ghee.
4. Drizzle of vegetable or olive oil.
5. Garlic powder all over the Chicken.
6. Red onion - about  half of it chopped
7. Fresh garlic - 5-6 cloves chopped.

Ingredients for the gravy / dipping sauce

1. Oil 1 teaspoon
2. Garlic cloves minced finely 1 teaspoon
3. Red chilly sauce 1 teaspoon
4. Soy sauce ( Dark ) 1 teaspoon
5. Sugar 2 teaspoon ( or as per your taste )
6. about 1/4 th cup water
7. Salt just a sprinkle as the sauces are already salted.
8. Black pepper sprinkle.


Preparation

1. Wash the chicken properly and with a paper towel pat dry it .
2. Make small incision with a sharp knife all over the chicken to help the marination enter into it.
3. Also make small slots in the chicken skin to help you rub the marination on the chicken properly.
4. Take a bowl and make a nice marinade using the ingredients under 1st marination(1 to point number 5 )  and then rub the marinade properly all over the chicken.The chopped onion and garlic ( point 6 and 7 ) will be stuffed inside the chicken.
5. Cover and leave the chicken to marinate overnight in the fridge ( NOT Deep Fridge )about 5 hours.
6. Next day take out the chicken from the fridge and leave it on the counter top to come to room temperature before applying the second marinade mentioned under ingredients for second marination.
7. Leave it for another 30 mins to marinate and then hard work done :)

NOTE -

1.  Coat the marinations both 1st and second marination properly all over the chicken as well inside the Chicken.
2. Rub the salt nicely all over inside out.
3. Oil and ghee should properly be coated all over the chicken inside and outside.

Cooking

1. Turn the oven temperature to 370 deg Fahrenheit around  188 deg Celsius and pre heat it.
2. Take a baking dish preferably little raised on the sides will be better because chicken will give out juices.Grease the dish.
3. Bake  the chicken ( I used the second oven rack from down ) for about 1 and half hour.
4. Now make the Sauce

a) Heat oil in a saucepan and add the garlic .
b) As soon as the garlic changes colour start adding the sauce mixed with little water and add the sugar.
c) Simmer it to bring it to your desired consistency.
d) NOTE - after your Chicken is baked and broiled in the oven transfer the water from the chicken tray into the dipping sauce when serving to make it more yummy.I drizzled little sauce on the chicken after i finished cooking in the oven before serving and the rest i kept on the sid eto use it as per personal preference.

NOTE 

1.I have broiled the chicken 1-2 mins just before completion of 1 and half hour  to get a little burn look.I changed only the mode not the Chicken from the rack.Do it cautiously as too much broiling can turn the chicken dry and tasteless.

2. Every oven is different so keep an eye.

3. I also used some White Onion ,Red Potatoes and also sweet potatoes along with the chicken to bake as seen in the picture. I just salted them ,drizzled oil, black pepper and Italian herbs.Serve sizzling hot just out of the oven :)


Pictures 


Tuesday, December 26, 2017

AKSHAYA PATRA - JoyOfSharing FoodForEducation

AKSHAYA PATRA - JoyOfSharing FoodForEducation 

Dear Friends

This article I am writing about  an Indian NGO dedicated to serve unlimited food for the underprivileged children so that these tender kids don't leave the school due to poverty and engage in child labour (a shame for our society)."Akshya"means which never diminishes and "Patra "means utensils.

God is very kind to many of us that we have more than the basic necessities of life and many a times in the journey of life we tend to forget to acknowledge it. Some eye-opening statistics follows :-

1. As per Akshaya Patra, just $15 per year (cost of a Pizza) could feed a child for an entire year.
2. They are serving wholesome meals to 1.6 Million School Children everyday.
3. They have 32 kitchens across the country.
4. Ten of Akshaya Patra’s kitchens have been certified as FSMS ISO 22000:2005 compliant, which means they meet the standards of the International Food Safety Management System (FSMS).

So friends, lets put our hands together to reach out these kids and gift them a better tomorrow. We are running a campaign for the same, link follows :-

https://www.foodforeducation.org/campaign/joyofsharing


Please share your comments and views on the same. Thank you.


Home remedy to do to get rid of acidity at home

Home remedy to get rid of acidity at home

Dear Friends,

At some point of time we all have experienced acid problem with symptoms of possible heartburn,nausea,regurgitation and bloating to name a few.

Mother nature is very kind to us as she has given us a wonderful remedy and as usual free of cost whether rich or poor and ever household has it.Don't get shocked to hear the name its "WATER".

I am very much thankful to my father who always taught me to resort to home remedies before trying other medications.He is the one who helped me out during my childhood days when I happen to have occasional  acid problems.

Just take a cup of  Luke warm water and slowly sip it just like you sip tea.After sometime you will see either you will burp and get relieve or vomit out.Try this simple remedy next time as soon as u experience symptoms of acidity before you go for any medications.

Your comments and suggestions are very valuable for me. Do leave a comment if you like.


What is Royal Jelly?

Royal Jelly


Dear Friends,

If you are wondering its a jelly served to the Royals then you are partly right..It is not a jelly made from fruit.So what actually is this thing.

Albert Einestine had said that if the bees disappeared off  the face of the Earth, man would only have FOUR years left to live.Yes, I am talking about something related to the honey bees.

We all know about honey but this Royal Jelly is also produced from the honey bees.Its given to the larvae of those honey bees from where the adult queen bee will be formed.Its a secretion from the nurse bees who are actually the worker bees at a young stage.

It is supposed to be nutritious as it is supposed to contain proteins,vitamins and amino acids.It is produced from the active glands (Hypopharyngeal gland ) of the nurse bees.It can be found in the market stores after its commercialization.It is used in the fields of medicine as well as  cosmetics.
Some side effects of royal jelly consumption are reported although rare.

Its always recommended to exercise a word of caution before consuming it.Studies and researches are under progress to harness the maximum benefits of  Royal Jelly and put it into various uses.


Monday, December 25, 2017

Benefits of Banana Plant

Benefits of Banana Plant 

Dear friends,

Today I would like to share with you some immense benefits of Banana plant flower,leaves and stem.

We all agree that Banana fruit has huge health benefits but did you know mother nature has blessed us with this plant whose not only the fruits but also the leaves,stem and Banana flower (rather an Inflorescence )has various uses.

In West Bengal ( Eastern India ) almost all household  has this Banana plant growing in their garden.I am also one of them.I used to play around the plant in my childhood days and waiting for the fruit to ripe. Sometimes I would hear my grandma shouting aloud to the bunch of Apes who came in the silent afternoon to eat the bananas when all of us took a nap after eating a huge platter of Rice:).

Gone are those days now but they are still alive in my memories.

Back to the topic :).

1. Banana leaves are widely used in India to serve food.They are washed and cleaned properly and food is served on them.Its also environment friendly as you can throw away the banana leaf after eating on it and our good Decomposers will quickly start their job and decompose them back into the soil.I myself  miss eating on them now.The ones I get in the supermarket now are not that fresh or have incision on them .

2. The Banana flower is also edible and has immense health benefits. In West Bengal ( India ) we either make a gravy dish or make banana flower chops or fritters /sometimes the white pointed inside part of the banana flower is boiled and eaten with boiled mashed potato.Someday I will post the recipes in my veg blog and non veg blog as it can be cooked also with prawn or shrimp :).It is also used in many Asian cuisine as far as I know.It has  some specific cooking process.

3. Opening and cleansing the Banana flower is a tedious task but I have found many Asian shops selling canned banana flowers .

4. The health benefits of Banana flower is immense its a storehouse of Important Vitamins and minerals including Vit A, C and E and Potassium and Magnesium.

5. The Banana stem ( In West Bengal it is called Thoor )is also edible and has many health benefits.In my household it was cut into small pieces and stir fried  with Pumpkin with little turmeric and pinch of sugar along with salt.I have seen them once in an Indian store.It is also has  some specific cooking process. It has a high amount of Iron and Vitamin.Iron is very important for our body as you may know Iron is required for the synthesis of Haemoglobin an important component of Blood which has 2 parts haeme the iron containing part and globin the protein containing part.

6. Friends, do not throw away the raw(green ) banana peel. It also has good health benefits. I have a very easy recipe for it. I will soon upload it in my veg recipes.

In short try to make use of this plant as much as you can in your diet . 

Your comments and suggestions are valuable for me :).

For recipe of Raw Banana click the link below :-

Kacha Kolar Kofta Curry recipe or Raw Banana Kofta Recipe


Turmeric and its many uses

Turmeric and its many uses

Dear Friends,

I consider Turmeric a wonder spice.Its native of the Indian subcontinent and Southeast Asia.Its scientific name is Curcuma longa .Its a member of the ginger  family Zingeberaceae. Its yellow hue is due to the presence of a compound called Curcumin. This active compound in turmeric gives it the anti inflammatory and antioxidant properties.

No wonder our ancestors and grandparents knew about it long time ago and used it in nearly each and every dish prepared daily in the household.

Many of you like me have seen it to be used in our family kitchen since our childhood.It not only imparts a beautiful hue to the dish but also has immense health benefits.

Some tit bits of Turmeric are listed below :-

1. In cooking as a spice in various curries,tandoori chicken ,pickles.

2. In Hindu marriage ceremony before marriage the bride and groom are applied a paste of turmeric on face and body which serves as a natural anti-bacterial agent.

3. It is also anti inflammatory.

4. It has a broad spectrum importance including in the fields of Medicine,Cosmetics,World Cuisine,Therapeutic purpose to name a few.

5. When buying turmeric nowadays a bit of caution is advised due to its possible adulteration with Metanil yellow colour,chalk powder etc.

6. Turmeric milk benefit is enhanced with addition of pinch of black peppercorn powder (Golmorich ) to help body to absorb the turmeric.

7. It is also said to boost immunity.

8. I myself benefit  when I drink a Luke warm cup of turmeric milk with a pinch of black peppercorn powder as soon as I start experiencing tonsil pain.I also add little honey to it.Its my personal preference.

9. Since Turmeric has Antioxidant properties ( the ability to counteract damage caused by the free radicals) and anti inflammatory so research is now being done in the field of cancer treatment as well.

 Note :-

It is always advisable to use caution and get advise of a doctor if in taking turmeric medicinally.

The intent of this post is to generate awareness among all of us about the importance of turmeric in our day to day life. Please share your views and comments .


Fried rice with vegetables Bengali style and mildly sweet

Bengali Sweet Fried Rice with Vegetables/Phulkopi aar Sobji diye Mishti Pulao


This dish is mildly sweet (you can increase the sweetness if you like ) with mild flavours of the vegetables,Gobindo Bhog rice and aromatic whole garam masala.


Preparation time - Soaking rice 30 mins and another 10 ins other preparation
Cooking time - Aprox 25 min

Ingredients:-

1. 1 cup Gobindobhog Rice (You can use Basmati rice but preference is Gobindobhog )

2. 2 inch Ginger grated or crushed in mortar and pestle

3. Whole spices ( 1/4th tspn black peppercorn,1/4th tspn shahjeera, 2 green cardamom,2 cloves,1 bay leaf,1 inch cinnamon )

4. 1 green chilly ( I used 1 red colour Indian chilly )

5. Mixed vegetables ( I used boiled vegetables - green peas, beans,carrot about half cup) and fried and partially cooked Cauliflower/phulkopi/gobi about half cup.

6. Water

7. Ghee 1 teaspoon(I used my Homemade ghee )

8. Vegetable oil 1 teaspoon( if using only Ghee/ clarified butter use 2 teaspoon ghee and omit the oil )

9. Raisins / kishmis about 10 in number

10. Water for cooking rice approx 2 cups

11. Sugar 2 tspn ( for a sweeter version add 1/2 teaspoon more )

12. Salt 1 and half teaspoon or as per your taste.

Preparation :-

1. Wash properly 3-4 times  and soak the Rice for about 30 mins and then drain out the water.

2. Cut the Cauliflower into small florets.

3. Boil or steam the mixed vegetables except the Cauliflower which you need to fry and partially cook while frying because with the rice the cauliflower will again be cooked.

4. Grate or crush the ginger with a mortar and pestle.

Lets cook :-

1. Take an utensil ( I use non stick )add 1 tspn ghee and 1 tspn oil and let it warm up and add the whole spices (you can also add the green chilly now but i prefer to add it after the rice is cooked ).Let the whole spices infuse its flavours.
NOTE - Cauliflower is already fried ( I shallow fried it in as much little oil I could- around 2 and half teaspoon )

2. Add the crushed/grated ginger and stir for less than a minute and add the raisins also.Then add the washed and drained rice and fry it.

3. When the rice is fried you will notice its giving out a "chit chit " sound and emits a beautiful fragrance and starts to stick to the bottom.Do this on a medium flame or the rice can burn.

4. Add about 2 cups water (some rice variety requires 1 and half cup water so it that case too much water can make your rice soggy) and also the half cooked Cauliflower along with 2 tspn sugar (don't add it before or fried rice can turn brown instead of white )and salt about 1 and half teaspoon or as per your taste.

5 Let it come to a full boil then quickly lower the flame and cover the utensil and let it simmer for at least 10 mins on a very low flame .I have a glass lid so its easier for me to keep an eye on it.If i find rice quickly absorbing the water I open the lid sprinkle very little water cover it and continue to cook on a low flame NOT high.

6. After 10 mins I fluff up the rice with a fork and add the boiled mixed veggies cover it and cook it for an additional 1-2 min on a very very low flame then switch off the flame and keep the utensil covered aside undisturbed for an additional 5 min before opening the lid and serving it.


Pictures :-


How to Renew Indian Passport in USA

How to Renew Indian Passport in USA


Dear Friends,
This article is regarding renewing Indian passport while staying in USA, hope these guide lines will be of some help for you:-

1. The prerequisite for renewing is that the passport expiration date is within a year.

2. Currently passport renewal is taken care  by CKGS (who does the initial paper works ) and then renewed by the Indian Consulate.

3. Initial documentation required are :-
a) Current address proof (it can be your electricity bill, current USA state's driver's license etc )
b) Your present passport which is going to expire.
c) Indian residential address proof if it has changed from the current passport address.
d) Your current passport size photos ( you can get it clicked from CVS pharmacy and they can provide the photos to you instantly ).
e) Your residential status (eg. -H1B copy/ approved petitions, L1 VISA or any other resident  status ).
f) There are some documents (provided by the CKGS ) which would need notarization and that can be done from the nearest public library FREE of cost.Also it can be done from the UPS store.

4. Apart from the above mentioned points some more important details follow:-
a) Check with your employer as most of the employers reimburse the passport renewal expenses which is around  $135.
b) If everything goes well the entire process takes around 15  business days to receive your new passport.
c) As a best practice get your passport renewed from here as it more convenient than in India.
d) If your VISA extension is in process and you don't  have the approved petition then they do not renew the passport for 10 yrs ,they renew it only for 1 year. ( We have faced this rare situation )so it is recommended that you renew your passport when you have the approved petition in hand.
e)For any queries reach out to CKGS customer care ,they are very helpful.
f) The CKGS link follows:-

https://passport.in.ckgs.us/howtoapply


NOTE :- 

The article is written with best of our knowledge and as per the present rules till date (12/25/2017).
Good luck with your passport renewal process :-)
Your comments are highly appreciated.


Sunday, December 24, 2017

GMO Food

      Organic and GMO's

  Dear Friends,

Most of us are now hearing about the benefits of organic foods verses those which are produced using high amount of fertilizers , harmful for both our body and environment but now a third one has joined the race ,its the GMO's or genetically modified organisms.

Many countries have banned GMO's but there are many who have not.Till now (24 th Dec 2017)India has given permission to only One cash crop that is cotton to be grown commercially but no food crops ,many food crops are under trial.Decision is still pending.

In USA a lot of genetically modified food crops have entered among which Soya beans,Sugar beets and Corns top the list.

USDA organic standards prohibit the use of GMO's  so look for organic Soya beans,Sugar beets and corns.Beside these even some cottonseed oil used in Bread making and other bakery product are largely GMO.

Also beware of  YEAST. Many company have brought into market NON GMO yeast look for those brands.

Almost all Sugar In USA comes from sugar  beets which are mostly GMO's if not mentioned Organic so opt for Cane Sugar which is not yet GMO.

Diet of Chickens can be from GMO's which in turn enters their body and from them to ours via food chain.Best to buy organic chicken same goes for EGGS.

Even Milk from cows,Cows if they eat GMO's may pose a threat to us via the food chain so opt for NON GMO/ Organic milk.

So the baseline is manage your budget so that you can concentrate more on eating healthy and quality food.If you are aware then you will surely find ways.

If not completely but whenever and where ever possible go for local,organic and NON GMO foods.


Friday, December 22, 2017

Spicy Chicken with Tamarind and Tea liquor/Chicken Kosha/Bhuna Chicken

Chicken with Tamarind and Tea Liquor/Spicy Chicken Kosha/Chicken Bhuna


This is a spicy and tangy a little dark coloured Chiken bhuna/kosha  with tamarind and tea liquor.It goes well with Fried Rice/Roti/Paratha/Poori.


Preparation time - Chicken marination minimum 1 to 5 hours & other preparation 10 min
Cooking time - around 50 minute

Ingredients for Chicken Marination:-

1. 1.34 pound that is around 600 grams Chicken.
2. 1+1/4 teaspoon Salt
3. 1/4 teaspoon Cayenne Chilly powder / Red chilly powder
4. 1/4 teaspoon Paprika / Kashmiri chilly powder
5. 1/4 teaspoon Turmeric powder
6.  Half tablespoon Ginger Garlic crushed in Mortar and Pestle( hamaldista )
 NOTE - I used 5 medium garlic cloves and 1 inch Ginger.
7. 2 tablespoon Curd

Other Ingredients

1. Dry roast ( approx 30 to 40 secs) and grind the whole spices (1 tspn coriander seeds+ 1 tspn cumin seeds+1/8 tspn Shahjeera+2 green cardamom+1/4 tspn black peppercorn+2 petals of star anise+ less than1/8 th of a Nutmeg+1/4th of a whole Javetri+half of a whole black cardamom (only the seeds not the outer skin )+1/4th of fennel seeds / Mouri+2 cloves + 1/2 inch cinnamon ).Be careful do not burn the spices.

NOTE :-

If you are using cinnamon powder instead of the 1/2 inch whole cinnamon use about 1/8th teaspoon and no need o dry roast the powder.

You will also need 1/4 th of Methi / Fenugreek seeds which you should dry roast separately till it turns brown and then grind with the above spices.

You will also need 1 dry red chilly to be dry roasted separately till it changes colour and then grind with the other spices.

Dry roasting of Methi / Fenugreek seeds and dry red chilly is done separately because it will take little longer time.


2. Make a paste with about 2 tablespoon of water  of the following spices

( 1/4th tspn turmeric powder + 1/4th Paprika or Kashmiri red chilly powder + 1/4th teaspoon Cayenne or red chilly powder +1/2 teaspoon Cumin powder +1 teaspoon Coriander powder.)

3. Whole spices for tempering ( less than 1/4 tspn Black Peppercorn +2 Green Cardamom + 1 Bay Leaf + 2 Cloves + 1/2 Inch Cinnamon ).

4. 1 tablespoon crushed ( in mortar and pestle ) Garlic .

5. 1 tablespoon crushed ( in mortar and pestle ) Ginger.

6. Little more than 1 cup of Onion paste.

7. 1/2 teaspoon of Tamarind concentrate dissolved in about 1 tablespoon water ( if you are using whole ripened tamarind test taste how much you want the sourness to be )

You can increase or decrease the amount of tamarind as per your sourness preference.Be cautious as you are also using curd/ yogurt.

8. 1 green chilly slitted

9. Salt 1 teaspoon or as per your taste.

10. Sugar 1 teaspoon.

11. 1 tspn of black tea dissolved in 1 cup of boiling water and half of this added while cooking.

12. 4 small Potatoes halved (optional )

13. Oil ( little less than 1/4th cup ) This recipe requires little more oil for cooking.If using little less sprinkle water as and when necessary to avoid the spices from getting burnt. I needed to sprinkle twice.

Preparation:-

1. Marinate the Chicken with the spices as instructed under ingredients for marination and marinate for at least 1 hr and max 5 hrs. I marinated for 5 hrs.

2. Dry roast on a medium to low flame all the spices mentioned under point 1 of other ingredients following the instructions given and grind it after it cools down.

3. Make a paste of the spice powders with 2 tablespoon of water  as mentioned in point 2 of the other ingredients.

4. Crush the garlic and ginger separately.

5. Make little more than a cup of Onion paste.

6. Dissolve the tamarind concentrate.

7. Make the tea liquor as stated above under point 11.


Cooking :-

1. Take an utensil and fry the Potatoes ( if you are using it ) with teaspoon of oil and just sprinkle of turmeric and salt.Keep it aside.

2. Pour rest of  the oil and add 1 teaspoon of sugar when the oil is warm  NOT hot and caramelize it and also add the whole spices for tempering as mentioned under point 3 of the other ingredients.Do this under low to medium flame. be careful not to burn the sugar as it will make the chicken bitter in taste.

3. Add the crushed garlic and when it turns little brown add the Onion paste. Go on cooking on a medium flame mixing and covering intermittently til you see that oil seeping out. Then add the crushed ginger cook for a minute and add the wet masala paste and mix.

4.Add the marinated Chicken after a minute mix and cover and cook for 2 minutes and then add the Potatoes( if you  are using). Go on cooking,covering it intermittently .

5. Do not use water as this is koshano or bhuna Chicken but if you see that spices sticking to the bottom just sprinkle very little water with your hands and mix and cover cook.When you open the lid transfer the water droplets inside the lid into the cooking pot and mix.Add salt at this point as per your taste.

6. Cook on a medium flame .It will take time but its worth the effort.

7. When the Chicken  and potatoes are nearly cooked add the tamarind water ( if you add earlier it will delay the chicken to get cooked) and half of  the tea liquor  and also the dry roasted spices which you have ground and mix and then cover it and cook .

8. When the Chicken and Potatoes are cooked completely switch off flame and let it stand for 5 minutes before serving the dish :).


Pictures:-


Dim kosha / Egg Gravy/Egg roast with potatoes/Egg Bhuna


A spicy,tangy tomato base egg dish with little gravy on the dry side, goes well with bread, fried rice,roti or paratha.

Preparation Time - 7 min
Cooking Time - 30 min

Ingredients:-

1. Three Eggs boiled.
2. 3 medium  Potatoes boiled partially.
3. 1 medium Onion ( I used 1 medium shallot )
4. 1 inch Ginger
5. 4 medium garlic cloves
6. 1 slited green chili ( I used Serrano )
7. 1 Tomato
8. Whole garam masala / spices (1 bay leaf,1/4 tspn jeera or cumin seeds,2 green cardamom,2 cloves,1 inch cinnamon )
9. Garam Masala ( 2 cloves ,2 green cardamom,1 inch cinnamon or 1/8th teaspoon cinnamon powder)
NOTE - dry roast these on a low heat for 30 secs and then grind it  but if you are using cinnamon powder instead of whole cinnamon then don't dry roast it simply mix with the other dry roasted spices).
10. 1 & 1/2 teaspoon coriander / dhaniya powder
11. 1/2 teaspoon paprika or kashmiri red chili powder
12. 1/4 teaspoon turmeric powder
13. 1/2 teaspoon cumin powder/ jeera powder
14. 1/2 teaspoon Red chilly powder or Cayenne chili powder ( Optional )
15. 1 & 1/2 teaspoon tomato ketchup
16. 1 tspn of Salt
17. 1 tspn of Sugar
18. Vegetable oil /Mustard oil about 3-4 teaspoon

Preparation :-

1. Boil the Eggs along with peeled and halved Potatoes for about 10 minutes ( I like my eggs little half boiled ) do it as per your preference.The Potatoes must be partially undone.

2. Dry roast and grind the masala/spices mentioned in point number 9 of the ingredient list .

3. Slice the Onion/ Shallot thinly.

4. Crush the Ginger in a mortar and pestle ( hamaldista )

5. Crush the Garlic cloves in a mortar and pestle.

6. Chop the Tomato into small cubes

7. Add about  2 tablespoon of water to the dry masala ( coriander powder +cumin powder +kashmiri red chili powder +turmeric powder) and make a paste.

Note :- You can use Red chilly powder or Cayenne chili powder about 1/2 teaspoon to increase the heat ( I did not use ).Use it as per your preference a little less or more.

Lets Cook

1. Take an utensil and add a teaspoon of oil and fry the eggs and Potatoes with a sprinkle of turmeric powder and salt ( very little ).Keep it aside.

2. Add another 2-3 teaspoon of oil . Add 1 tspn of sugar and wait for it to caramelize.Do this on a medium to low flame. The sugar will slowly turn brown but don't burn it or the  recipe will turn bitter in taste. Then add the whole garam masala.

3.  Then quickly add the crushed garlic and wait for it to turn light brown.

4. Then add the sliced onion / shallot and fry it it golden brown in colour.

5. The add the crushed  ginger and fry it for a minute.

6. Next add the wet masala paste with the chopped tomato and mix.

7. Cover and cook mixing intermittently.

8. Then add the Eggs along with the Potatoes and mix.

9. If the masala starts sticking to the pot just sprinkle water but don't add too much water . When the masala is done oil will seep out .

10.   When you see the potatoes are also cooked properly add the dry roasted garam masala and the slited green chili.

11.  Serve the dish with Roti or fried rice or even bread.


Pictures :-


Wednesday, December 20, 2017

Mac and Cheese With Veggies and a Twist


Mac and cheese not in the traditional way but with a twist.More  rich and creamier  with the goodness of veggies.


Preparation time - 10 min
Cooking time - 30 min

Ingredients :-

1. 1 cup Macaroni pasta
2. 1 cup milk
3. 2 cups water
4. 1 tspn salt ( use as per your taste )
5. Chopped mixed veggies ( I added coloured bell peppers ,Serrano chilly,half of a large onion,1 small Potato,about 1/4th cup of frozen peas and corn )
6. Half table spoon of butter for frying the mixed veggies.
7. 1 tablespoon of butter
8. Less than 1/4 th cup maida or all purpose flour
9. 1 cup milk
10. Mixture of shredded cheddar and mozzarella cheese 1/4 th cup( Out of this keep little cheese separate as topping) if you like more cheesy you can add little more on top.
11. Black pepper/ Golmorich less than 1/4th teaspoon
12. Crushed red pepper sprinkle (optional )
13. Salt for sprinkling on the veggies and white sauce (We will make the white sauce ) ( as per our taste)
14. Sprinkle of cayenne or red chilly powder.


Note :-

Since we are using salted butter and cheese which already has salt so adjust the salt as per your taste.

Preparation :-

1.To make the pasta creamier I have used a twist that is I will boil the pasta in 1 cup milk + 2 cups water as per the package direction. keeping it little undone so as to cook it when it is baking.

Note - Since we will also bake the pasta so keep the pasta little undone so the rest is cooked when it is baking. I like the texture of pasta little soft so I boiled the pasta for nearly 12 minutes. Adjust it as per your liking.

2. Chop all the veggies into small cubes ( Onion, Potato,Bell Peppers/ Capsicum) chilly i have cut into circles.
3. Thaw the peas and corns if using frozen.
4. Grease the baking dish with butter.

Lets start cooking :-

1. Boil 1 cup milk with 2 cups water and when it comes to a full boil add 1 cup of Macaroni pasta to it along with salt ( I added 1 tspn you adjust as per your taste ).Bring the flame to medium.Cook it as per package instruction but leave it little undone because we will bake it again in the oven. I cooked it approx 12 mins.Add the potatoes to the pasta 5-7 mins before the pasta is done so that the potatoes are also partially cooked with the pasta.

Note :-

Take caution as it has milk so it can bubble up and overflow.I will not strain the pasta so this milk and water mixture along with the potato starch will form a kind of think gravy with the pasta.Keep an eye so that the pasta does not stick to the bottom.If the liquid lessens and pasta is still uncooked add little water at a time to prevent sticking.

2. When the pasta is boiling take another utensil and saute the veggies EXCEPT  the potato and chilly.Add little about half tablespoon butter in a pan add the onion wait till it wilts or turns translucent and then add the veggies and sprinkle of salt and cayenne or red chilly powder.Keep it aside when done.

3. Then we will prepare the white sauce.Add about a tablespoon of butter and when it melts add less than 1/4th cup of maida or all purpose flour and on a low flame mix it till the raw smell goes ,at this point add 1 cup of milk slowly and keep stirring to avoid forming lumps.Add sprinkle of salt and less than 1/4th teaspoon black pepper.Then add the cheese.We want a smooth white sauce.
4. Add the Macaroni pasta and potato boiled with milk and water to the white sauce and mix gently.

5. Take a greased baking dish and pour the White sauce mixed with  Macaroni pasta and potato boiled mixture.Top it with the sauted veggies and the green chilly and sprinkle some more cheese on top.Add crushed red pepper ( optional ) now or after baking .

6. Your oven must be preheated to 350 degree Fahrenheit  that is around 180 deg Celsius before placing the baking dish with the pasta.Bake it for around 15 mins until the cheese is bubbling and melts. this time may vary a little as per your oven.

7. Serve  hot and enjoy anytime or on a winter night this delicious baked pasta.

Pictures :-


Sichuan or Szechuan Fried Rice Recipe

Sichuan or Szechuan Fried Rice Recipe This Chinese style Sichuan  fried rice is spicy(you may adjust the spiciness as per you...

Popular from my blog